Installing macOS Sensors via Jamf Now
- 03 Aug 2023
- 4 Minutes to read
- Contributors


- Print
- DarkLight
Installing macOS Sensors via Jamf Now
- Updated on 03 Aug 2023
- 4 Minutes to read
- Contributors
- Print
- DarkLight
Article Summary
Share feedback
Thanks for sharing your feedback!
Jamf Now is an MDM solution that provides an easy way to manage Apple devices for small and medium-sized businesses. LimaCharlie sensors can be deployed via Jamf Now for easy app distribution and inventory capabilities.
Prerequisites
- a Jamf Now account;
- a provisioning profile that grants the necessary pre-authorizations (such as is available here) for deployment on the clients;
- a LimaCharlie Mac sensor installer package (
.pkg) that’s configured as desired for deployment on the clients.
Set up your account on Jamf Now
- Create a Jamf Now account at https://signup.jamfnow.com, and log in.
- Choose the “APNs” tab in the sidebar, and click “Get Started”.
- Click “Download Certificate Signing Request.plist” and save the plist.
- Click Next in the lower right.
- As per the “Create an Apple Push Certificate” checklist shown, click “Open the Apple Push Certificates Portal”.
- Log in with your Apple ID.
- On the “Apple Push Certificates Portal” page to which you are redirected, click the green “Create Certificate” button.
- Accept the Terms of Use, and click Continue.
- On the “Create a New Push Certificate” page to which you’re redirected, specify the plist you downloaded in step 2 and click Upload.
- On the “Confirmation” page, click Download and save the new PEM certificate file.
- Navigate back to the Jamf Now page as at step 5, and click Next in the lower right.
- On the “Upload Push Certificate” page, specify the PEM you downloaded in step 10.
- Under “Save Your Apple ID”, annotate same as Jamf invites to do so, and click Save.
Prepare the LimaCharlie sensor installer package on Jamf
As a prerequisite you must have on hand a LimaCharlie Sensor installer package (.pkg) that’s configured as desired.
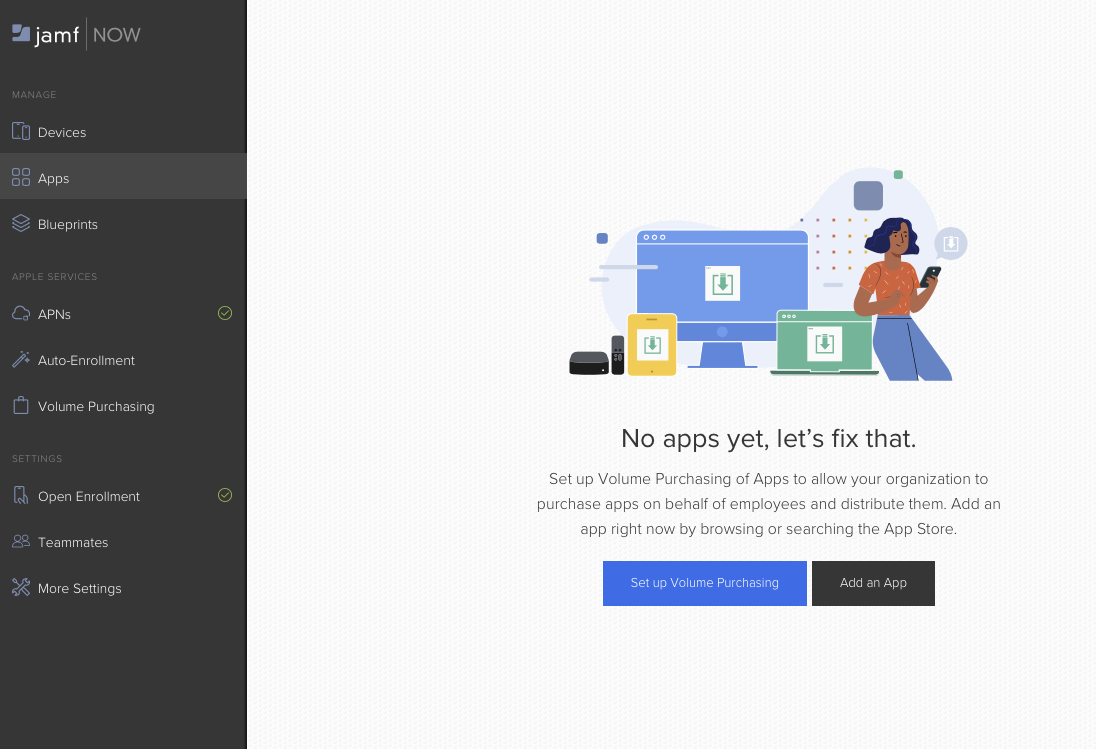
Choose the “Apps” tab in the Jamf Now sidebar. It will show “No apps yet, let’s fix that.”
Click “Add an App”.
- On the “Add an App” page, click “Upload Your App” in the top menu.
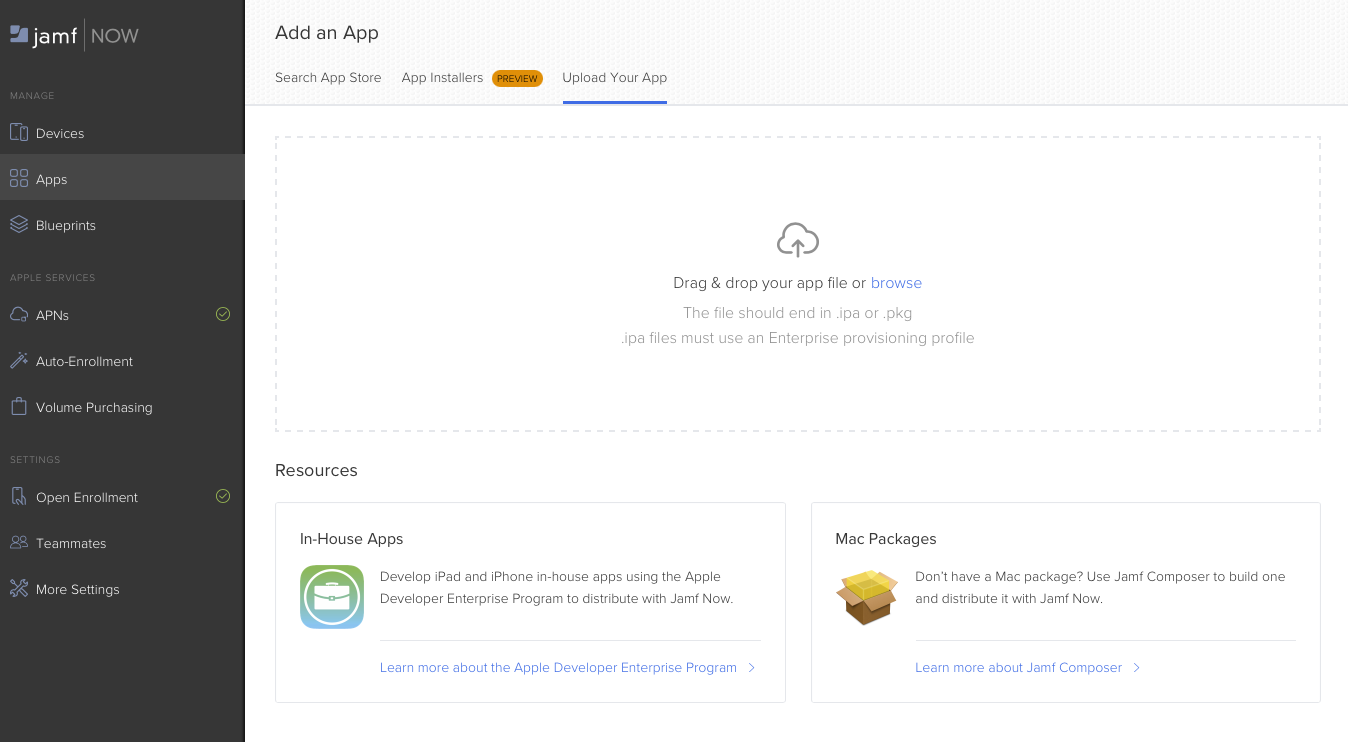
Drag your LC Sensor package installer onto the page (or click “browse” to locate it) to upload it to Jamf.
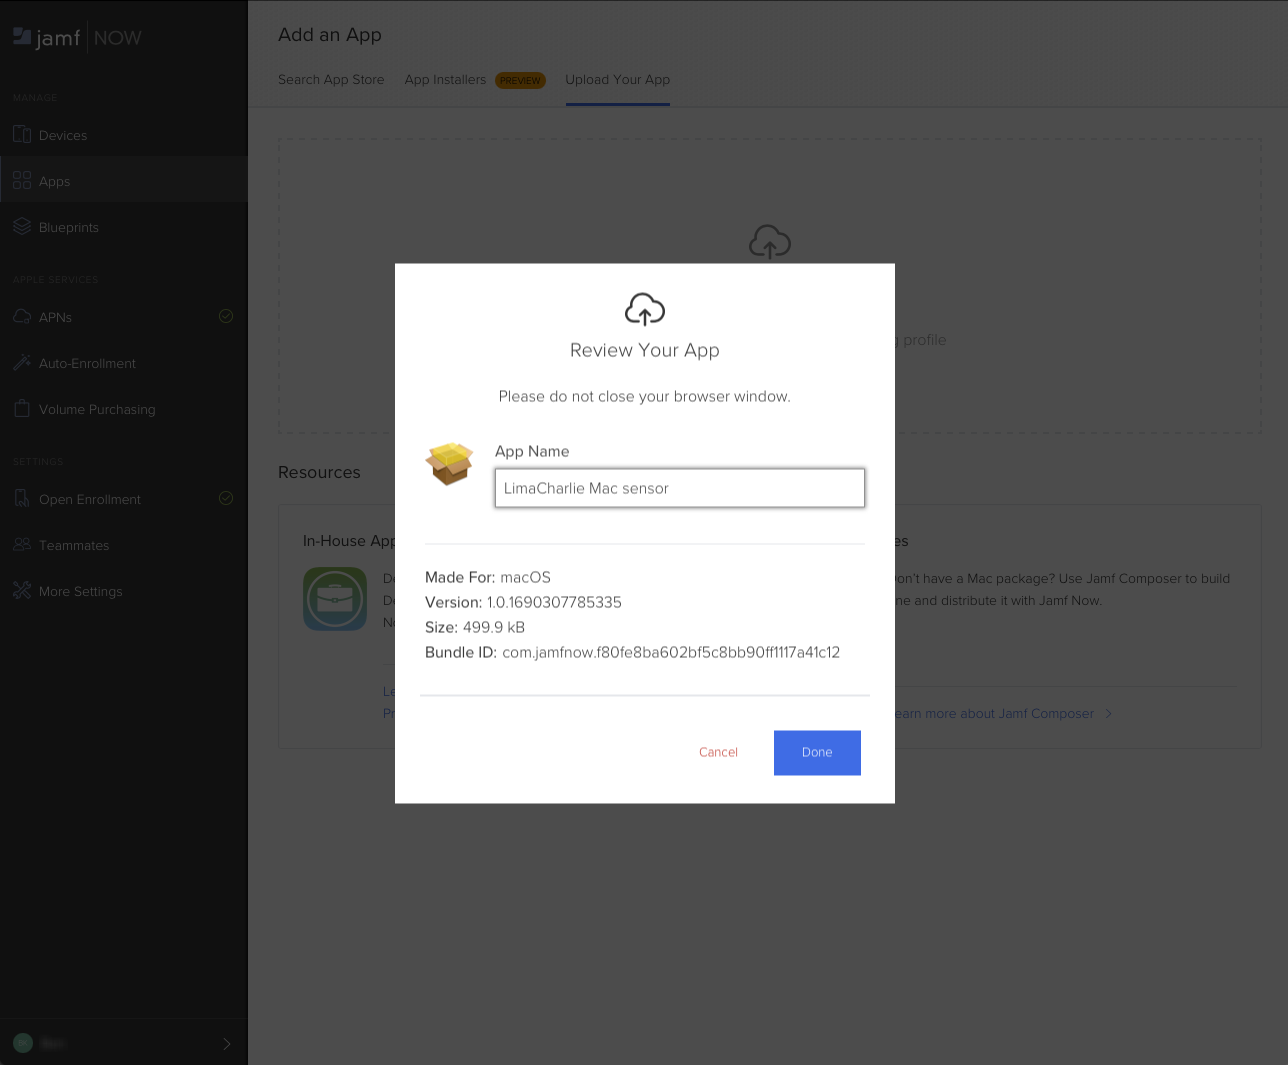
Give the package an appropriate name, and click Done.
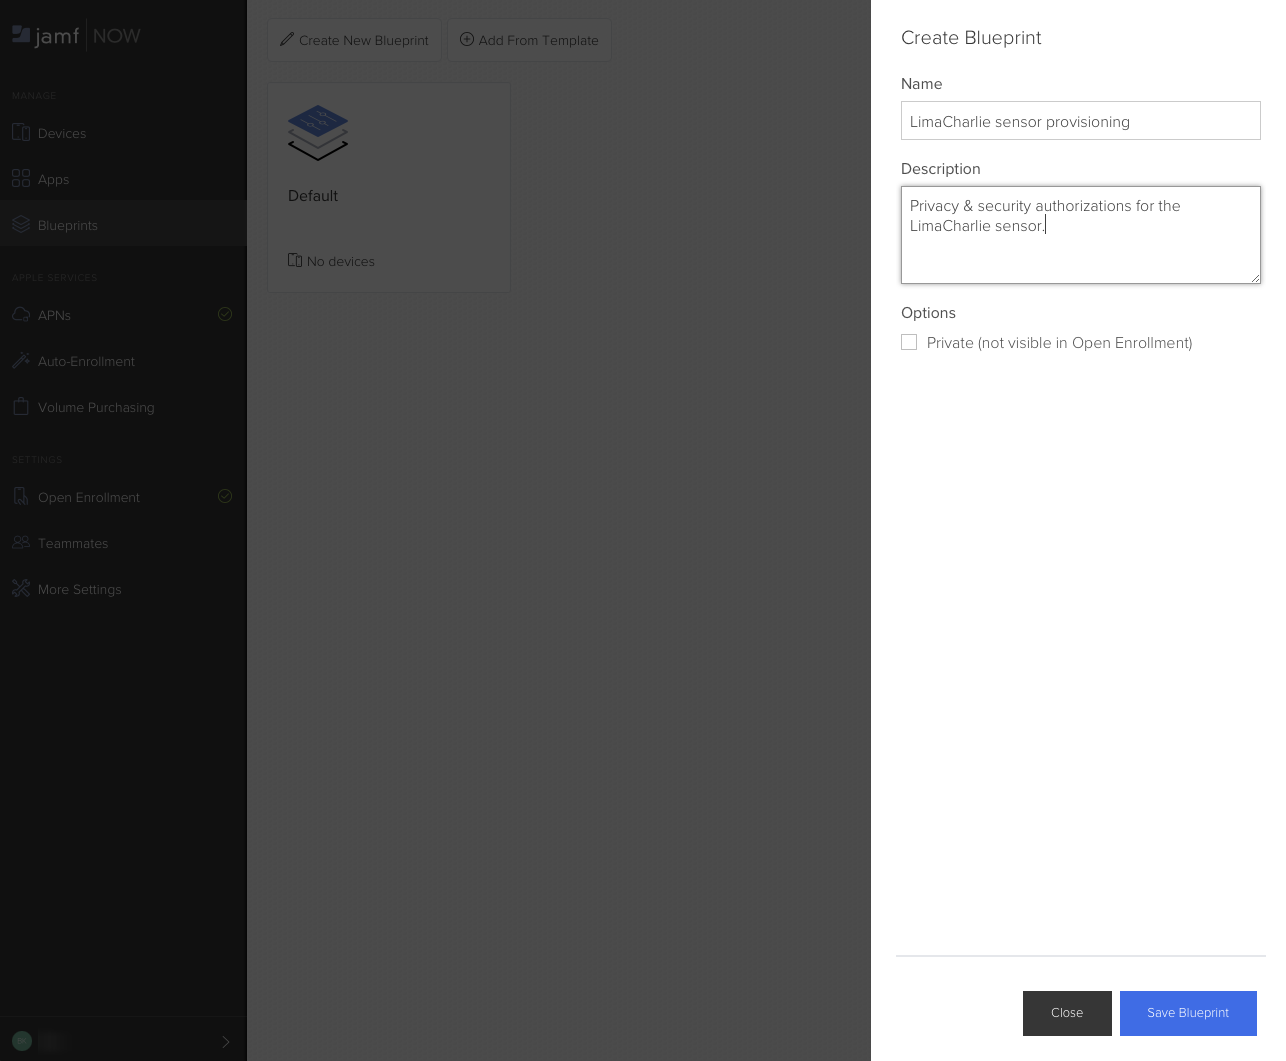
Prepare the LimaCharlie sensor provisioning on Jamf
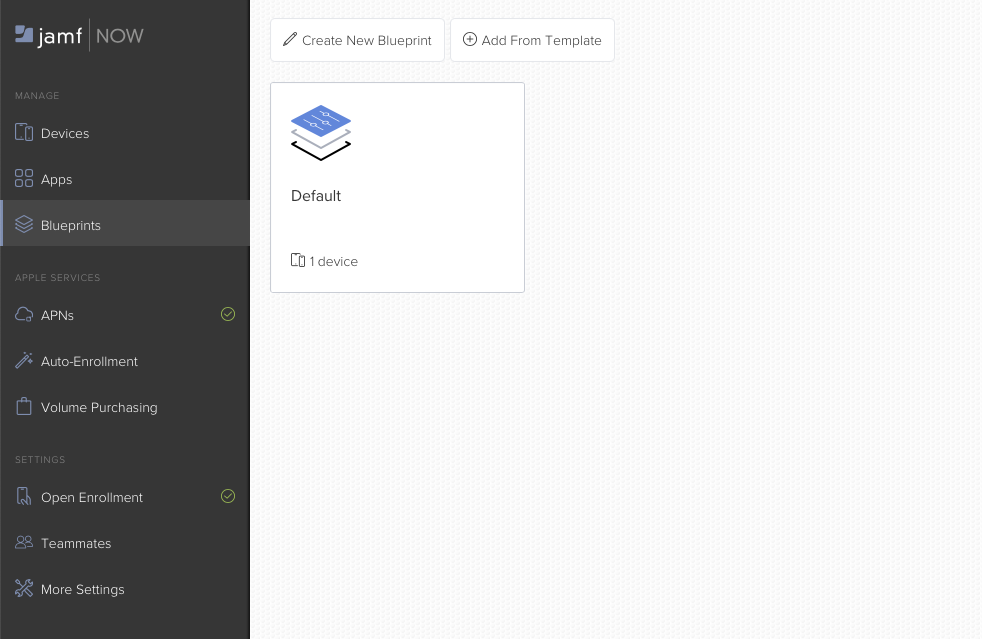
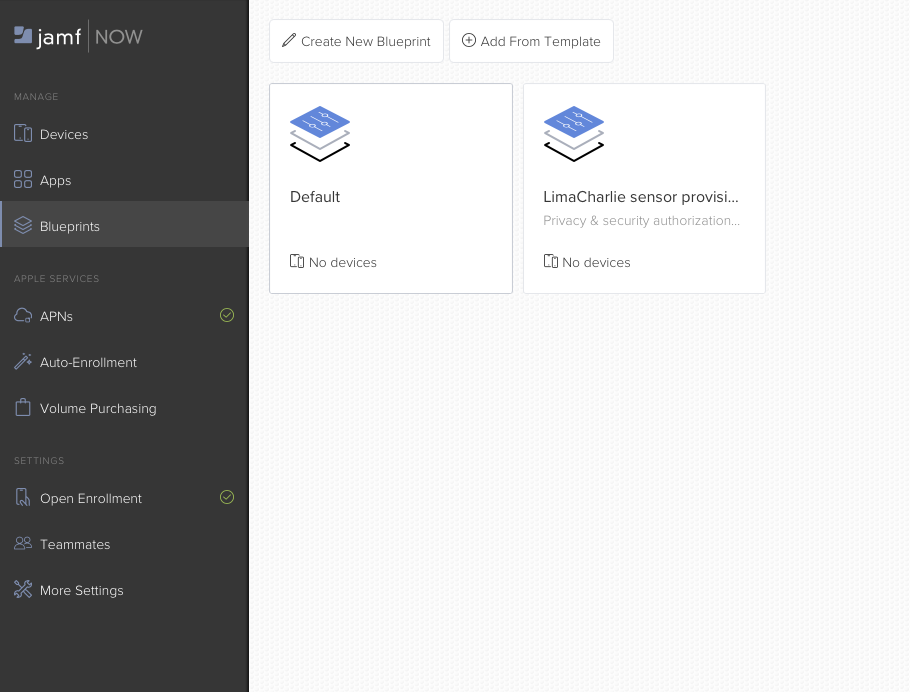
Choose the “Blueprints” tab in the Jamf Now sidebar.
Click “Create New Blueprint” at the top.
- Enter a meaningful Name and Description as prompted, and click Save Blueprint.
- Click on the entry for your new Blueprint.
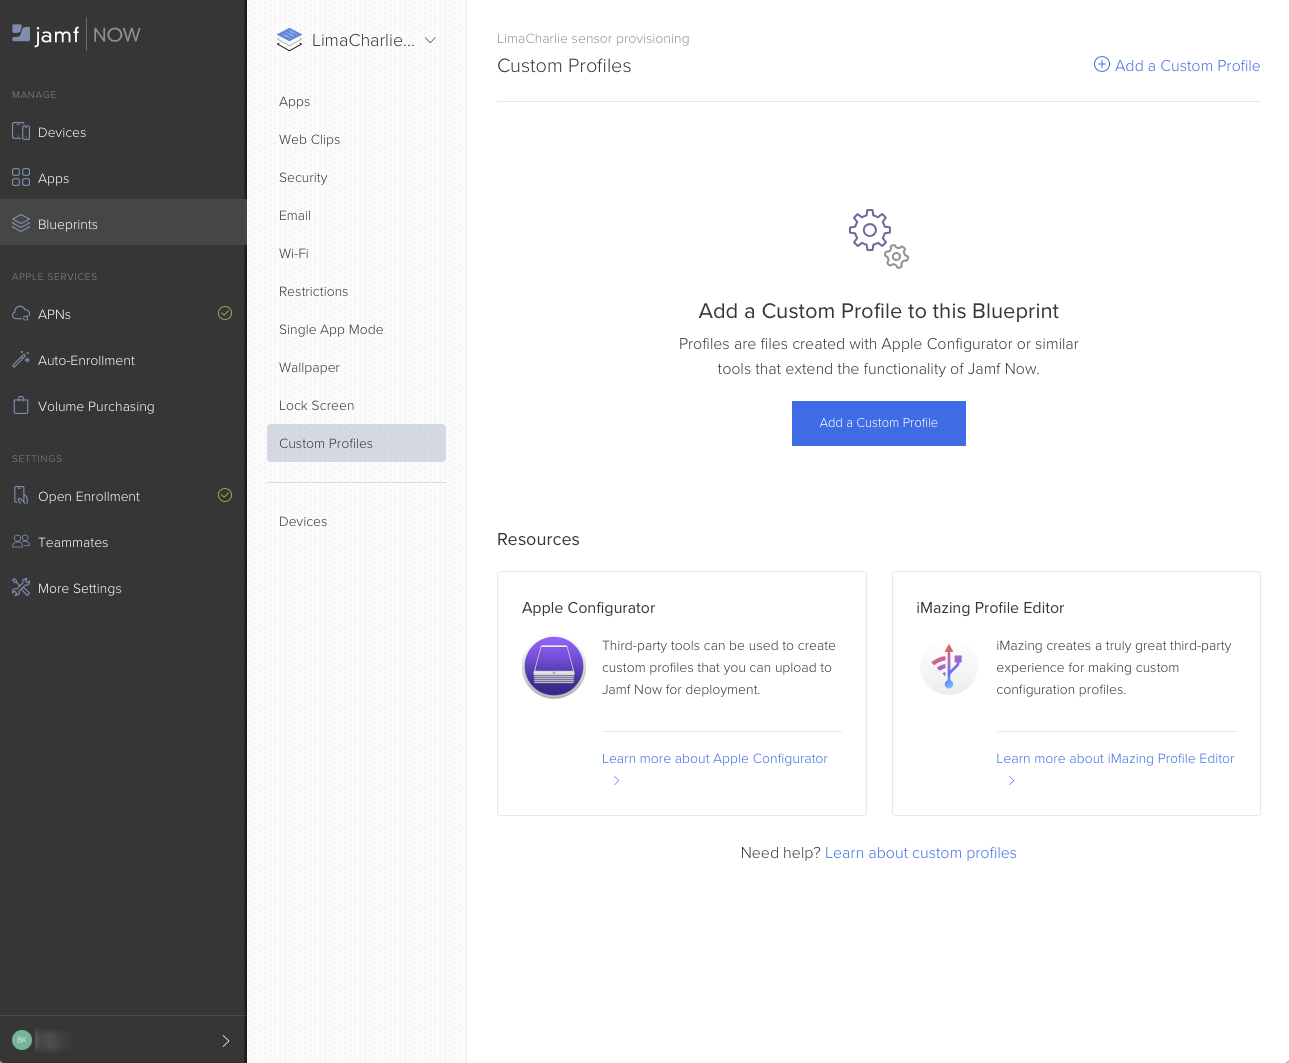
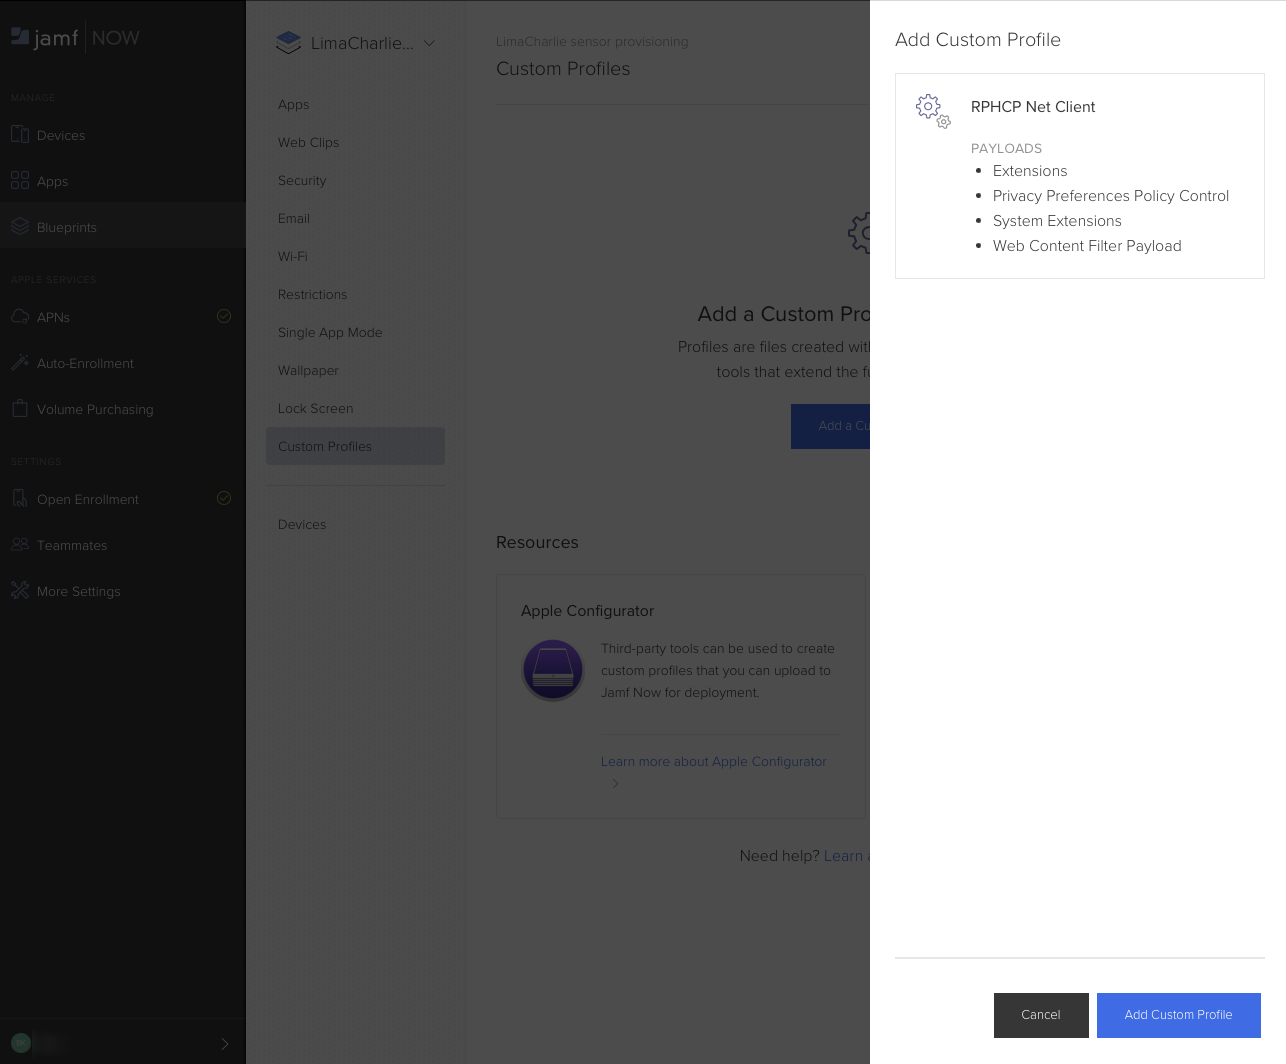
- On the inner tab bar that appears, click “Custom Profiles”, and then “Add a Custom Profile”.
- Drag your LimaCharlie mobileconfig file onto the page (or click “browse” to locate it) to upload it to Jamf.
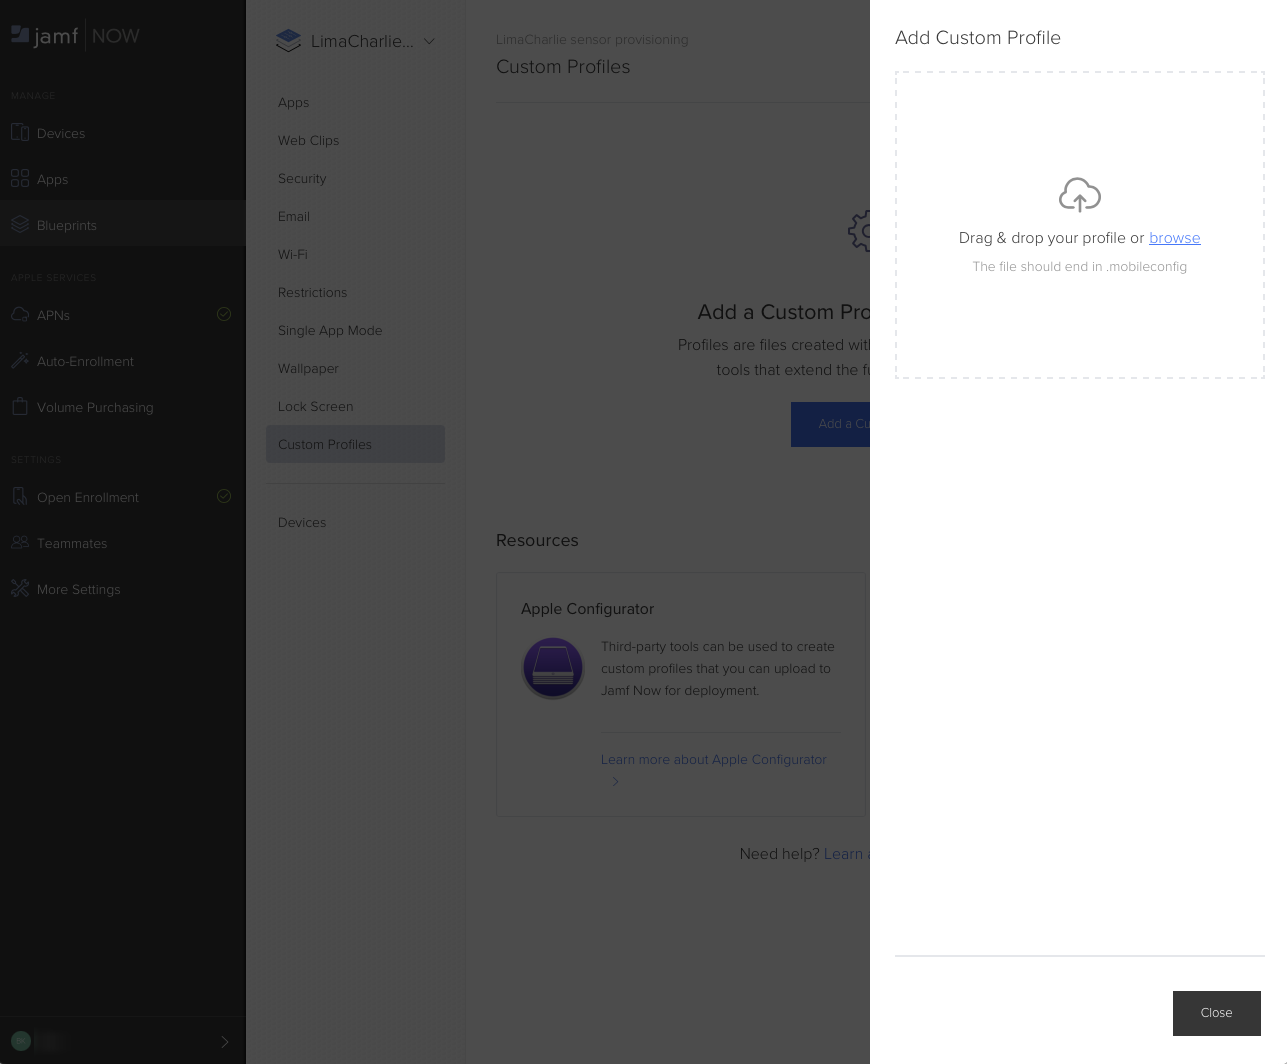
- Click “Add Custom Profile” in the lower right.
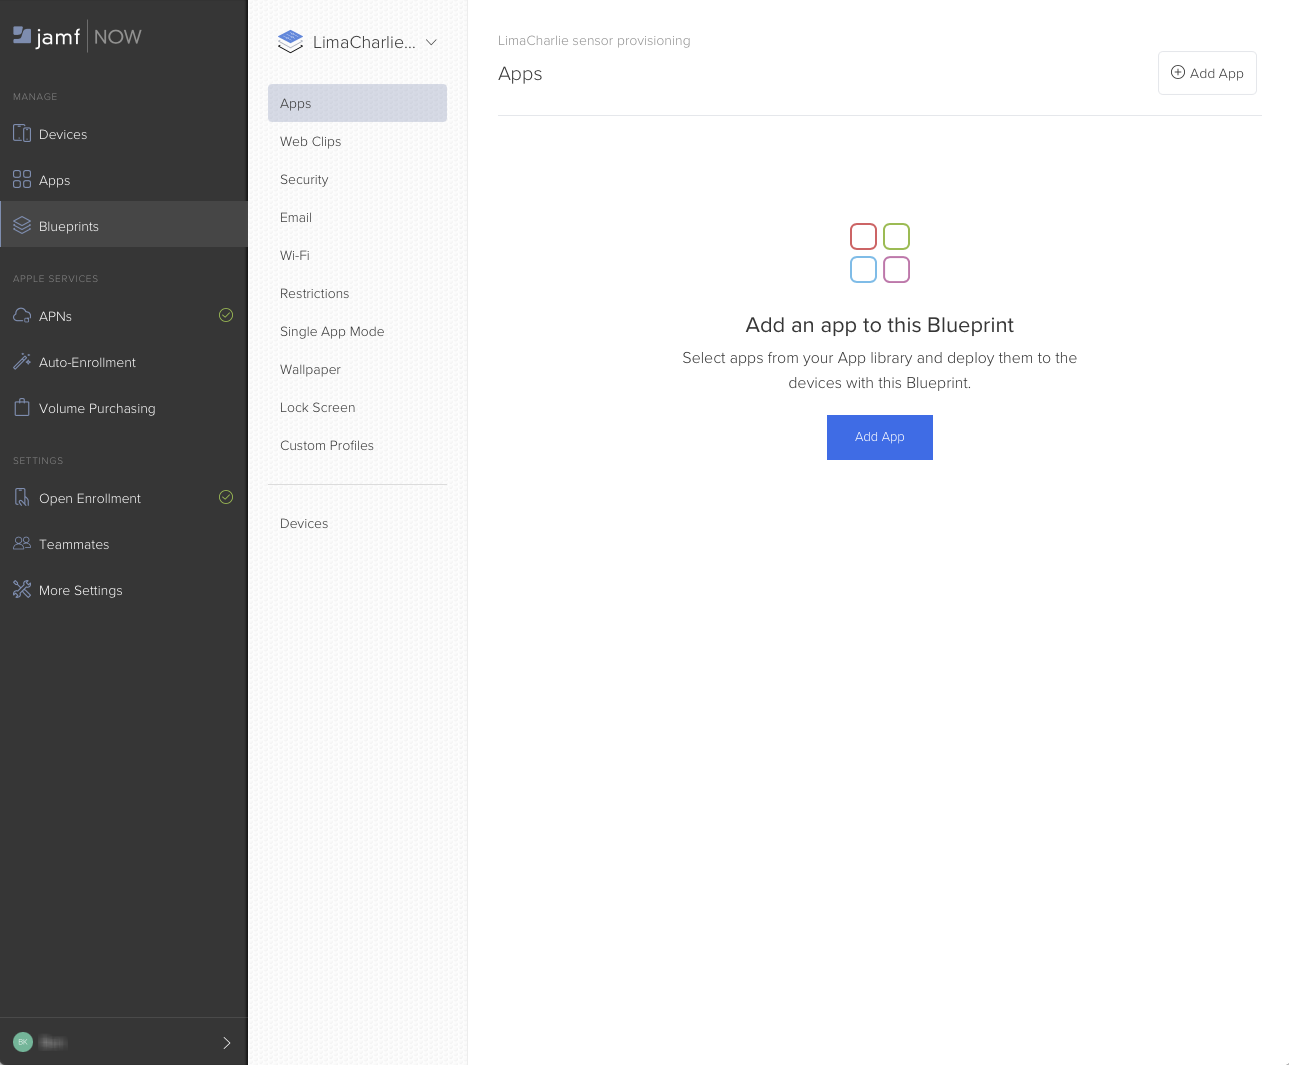
- On the inner tab bar, click “Apps”, and then click “Add App”.
- In the list, enable the “Install Automatically” checkbox for with the installer package that you uploaded earlier.
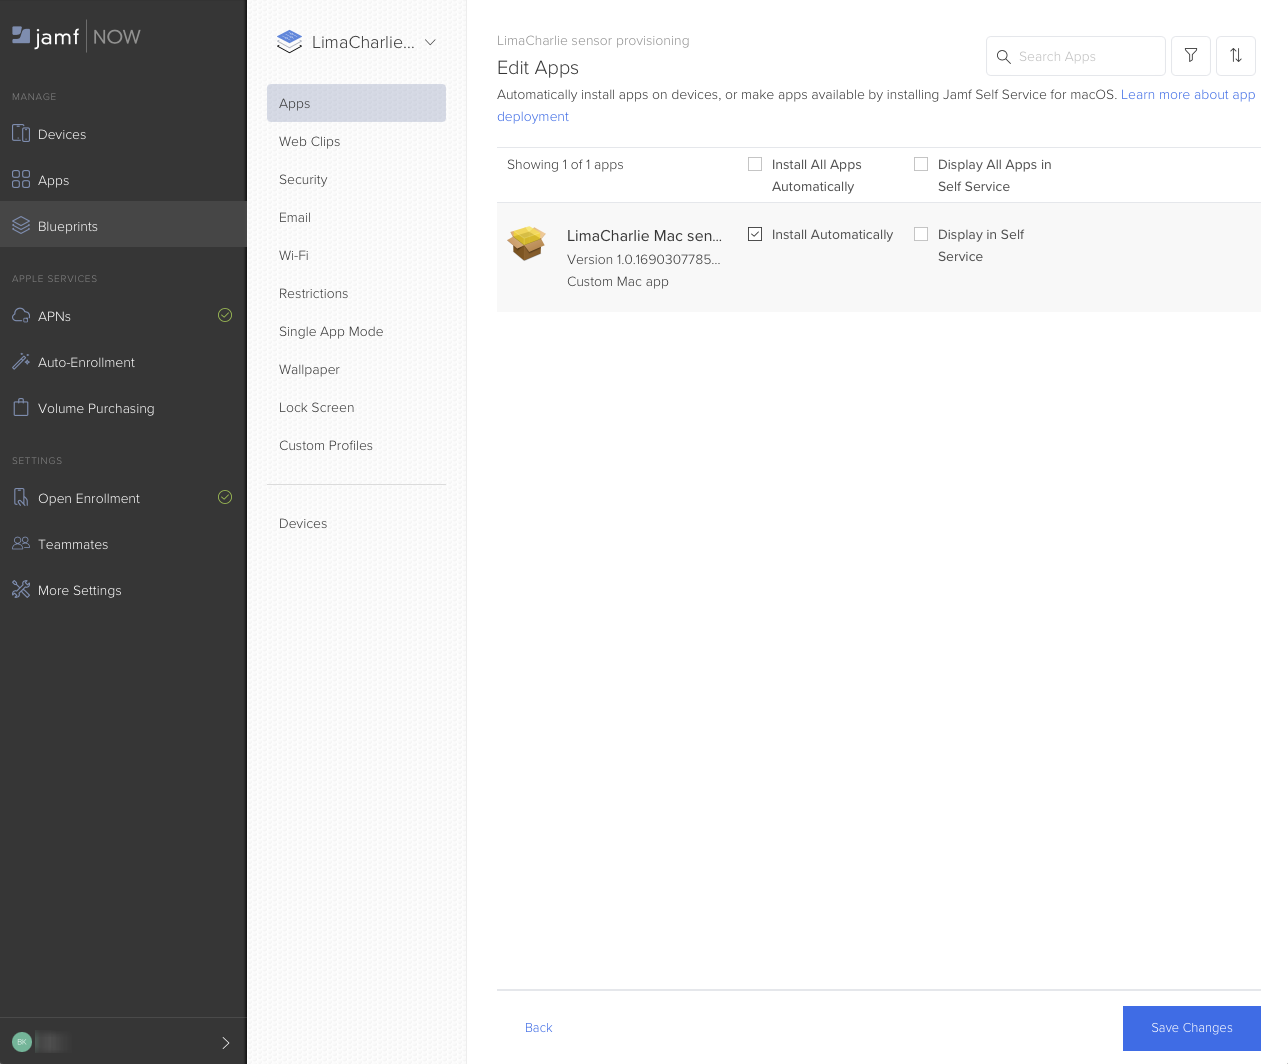
- Click “Save Changes” in the lower right.
Prepare Jamf Now to enroll devices
- Choose the “Devices” tab in the Jamf Now sidebar. It will show “No devices yet, let’s fix that.”
- Click “Enable Open Enrollment”.
- On the “Open Enrollment” page, activate the “Enable Open Enrollment” checkbox, enter an Access Code as prompted, and click Save Settings.
- Take note of the indicated enrollment link.
Enroll a Mac for management in Jamf
The following recipe presumes the use of MacOS 13 (Ventura).
On a subject Mac, visit the enrollment link from step 4 in the section above.
Enter the appropriate Access Code and user name, and click Start Enrollment.
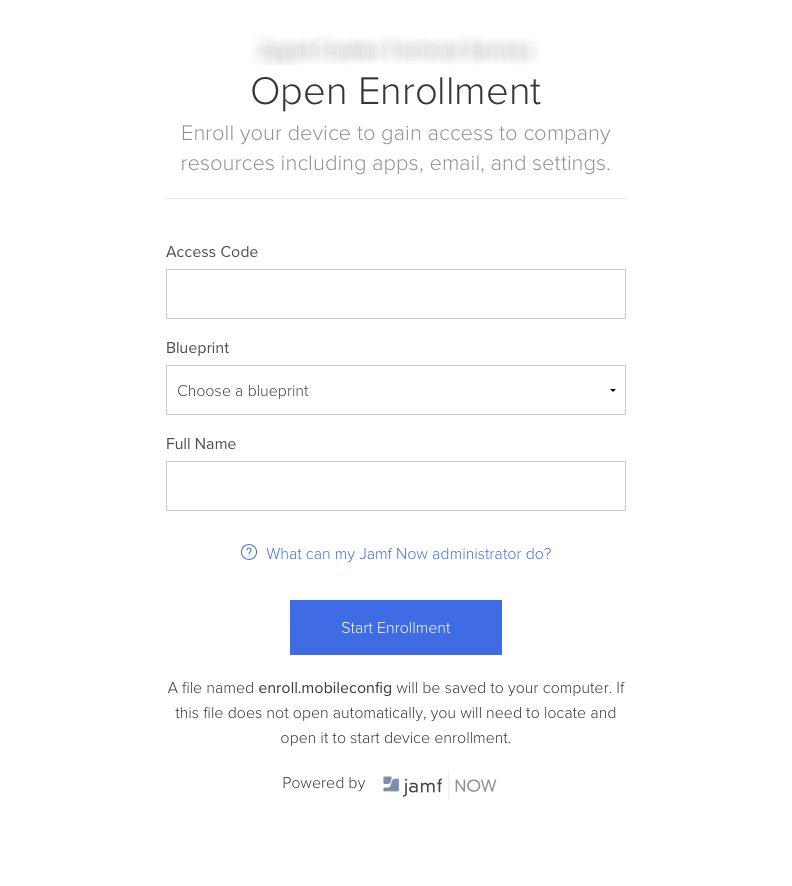
Save the “enroll.mobileconfig” file that begins to download, and then open it in the Finder by double-clicking.
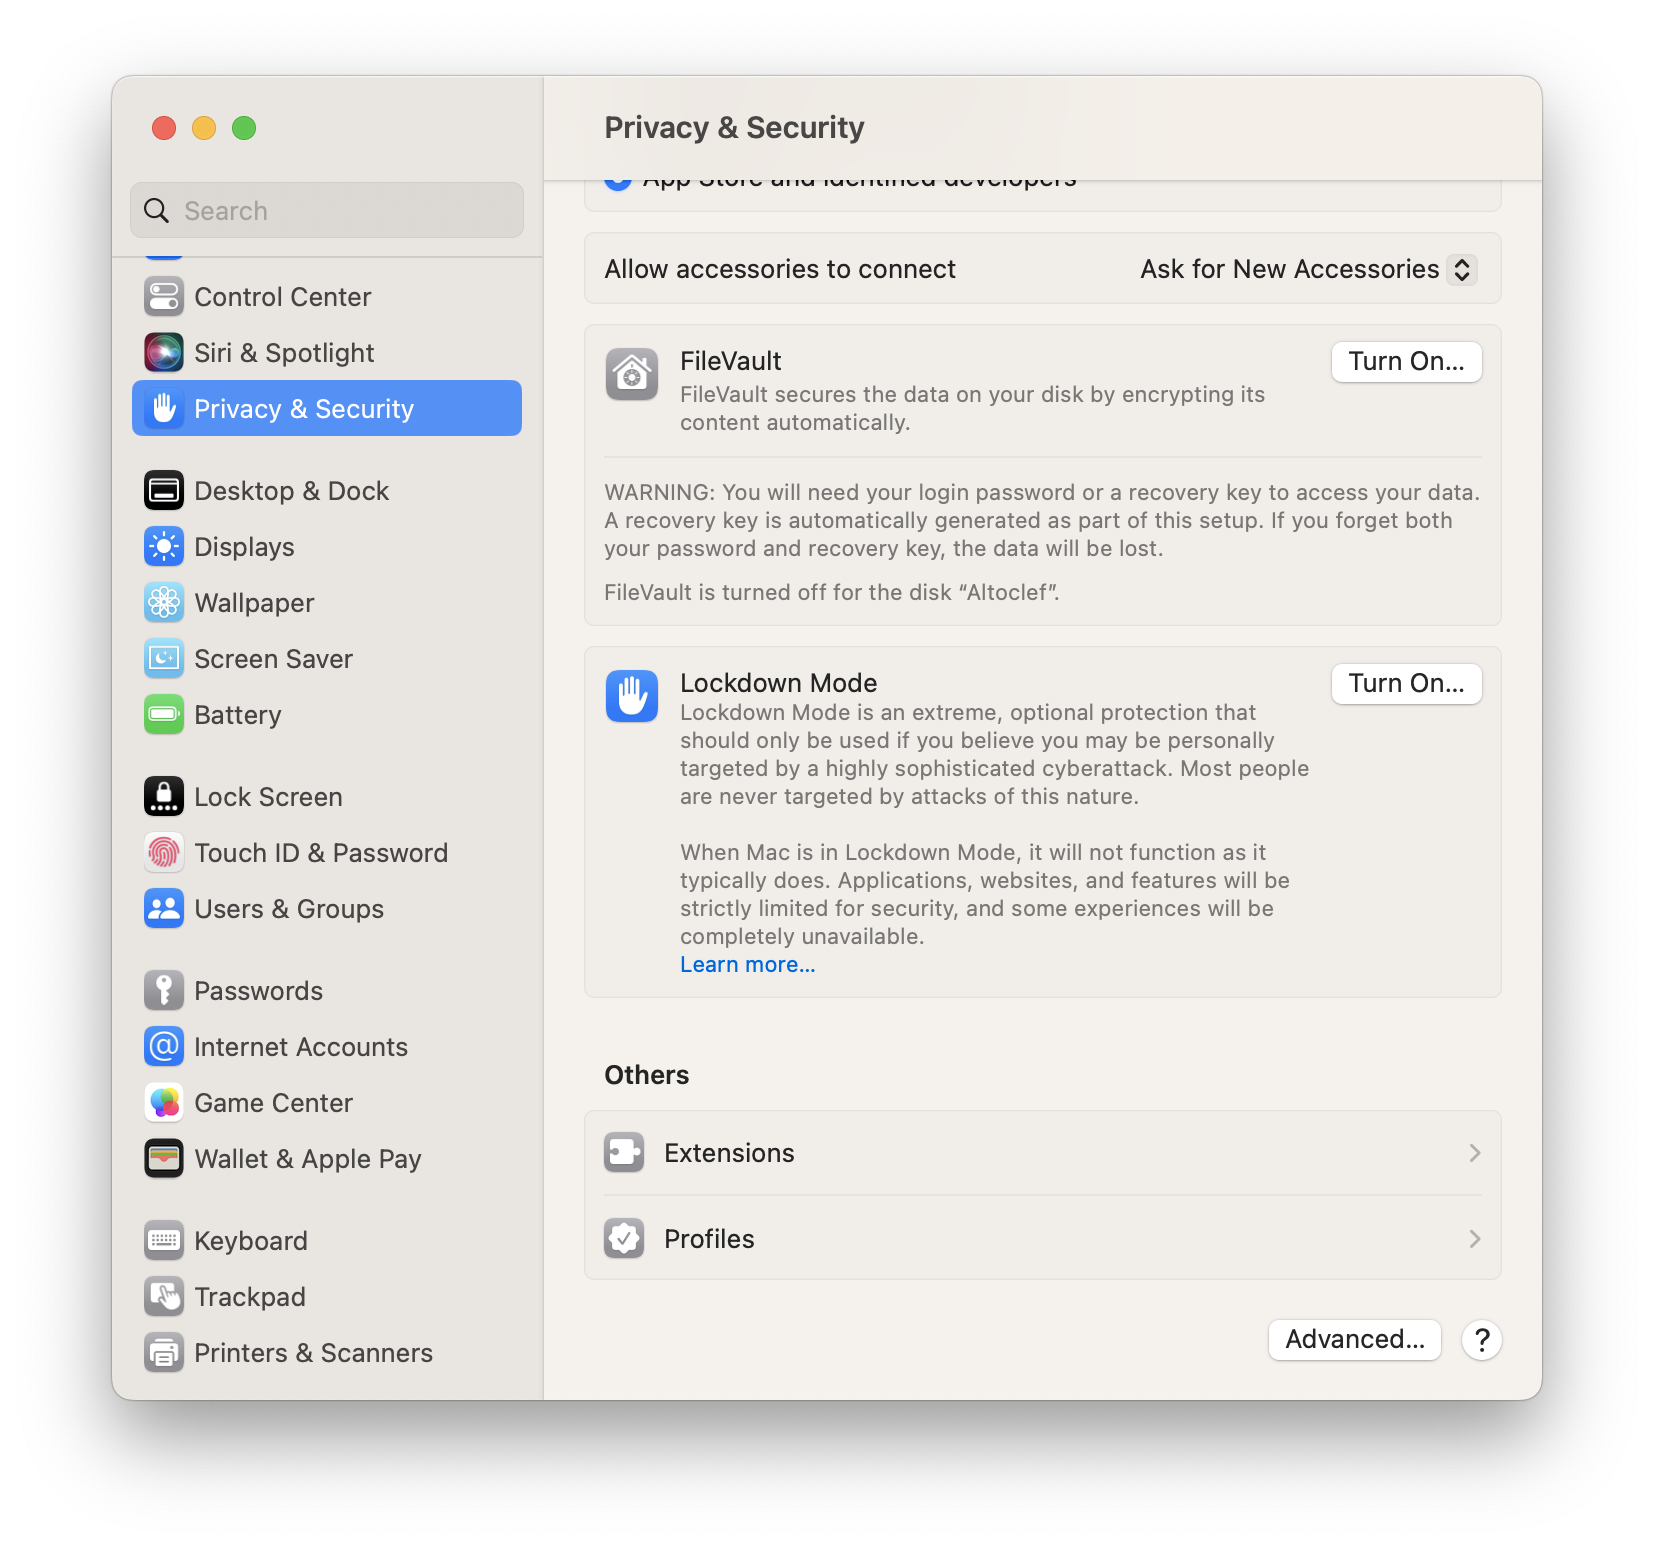
Open the System Settings app and navigate to the newly-installed profile.
- Choose “Privacy & Security”.
- Scroll to the bottom, and under the “Others” heading, click “Profiles”.
- Double-click on the “
Profile”.
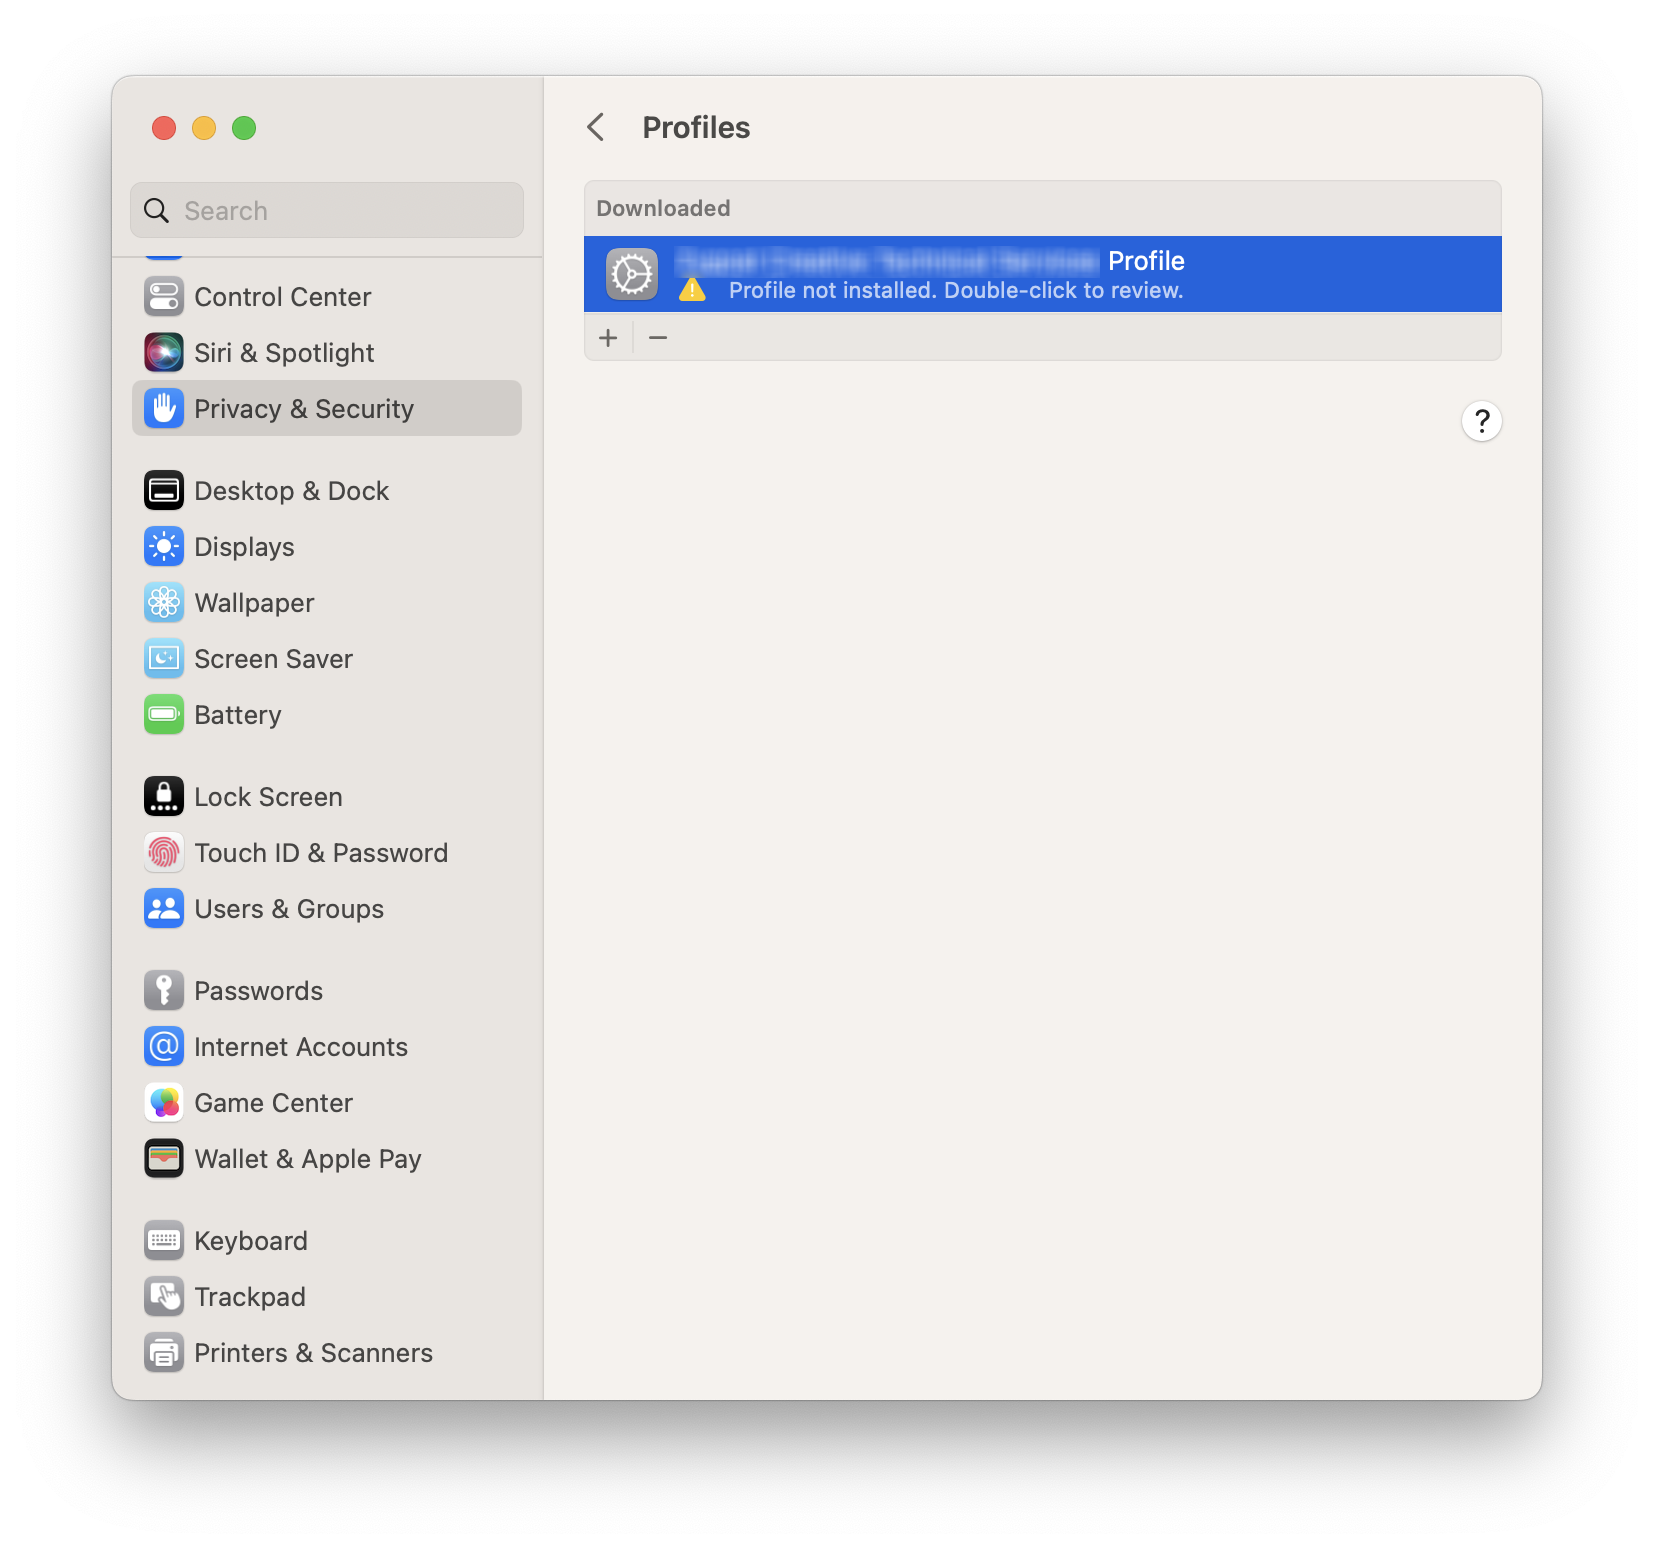
- Click “Install…” in the lower left.
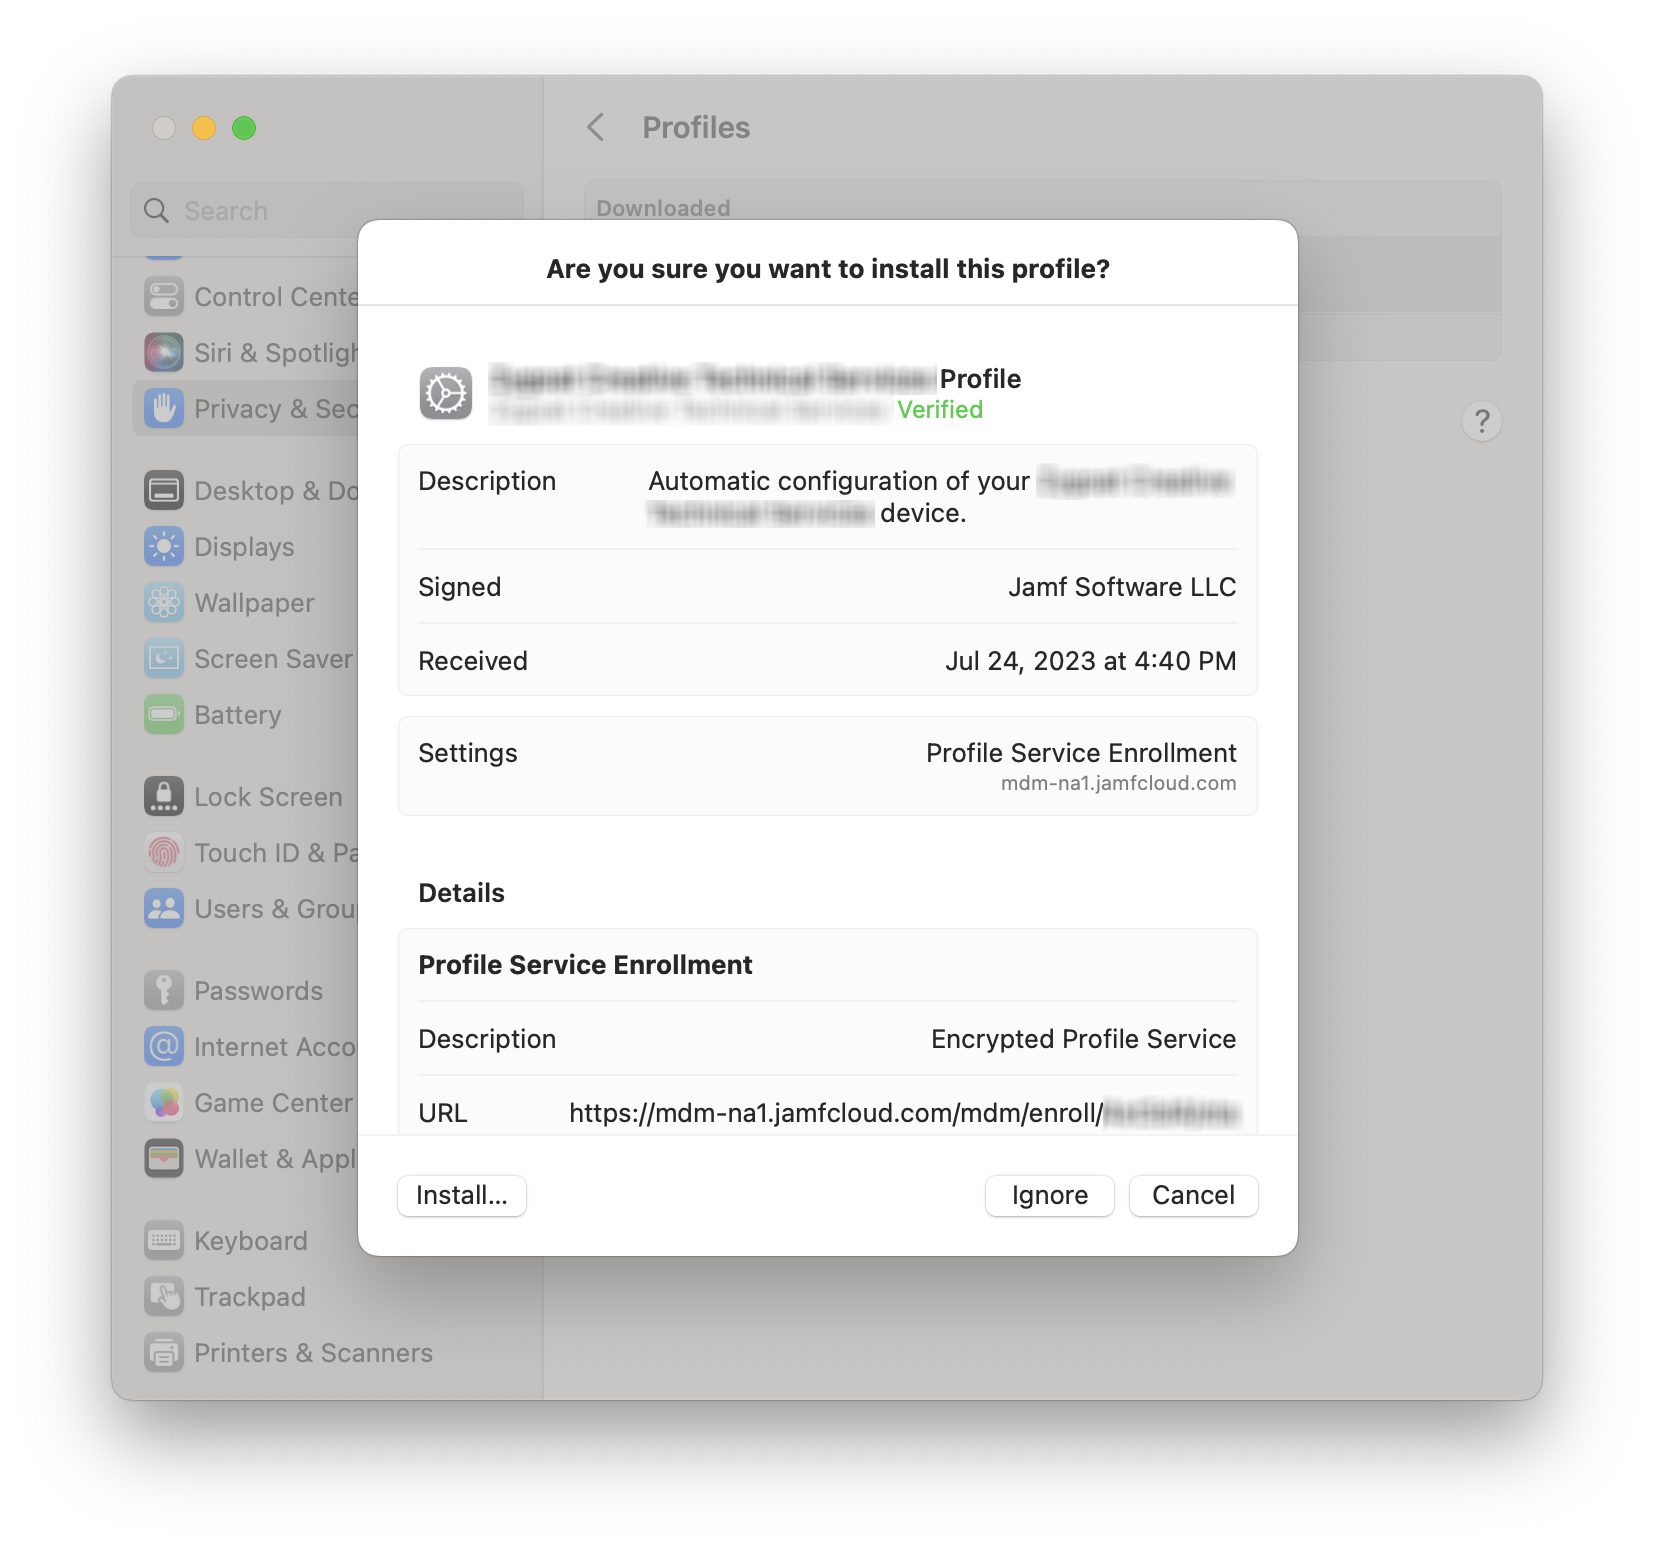
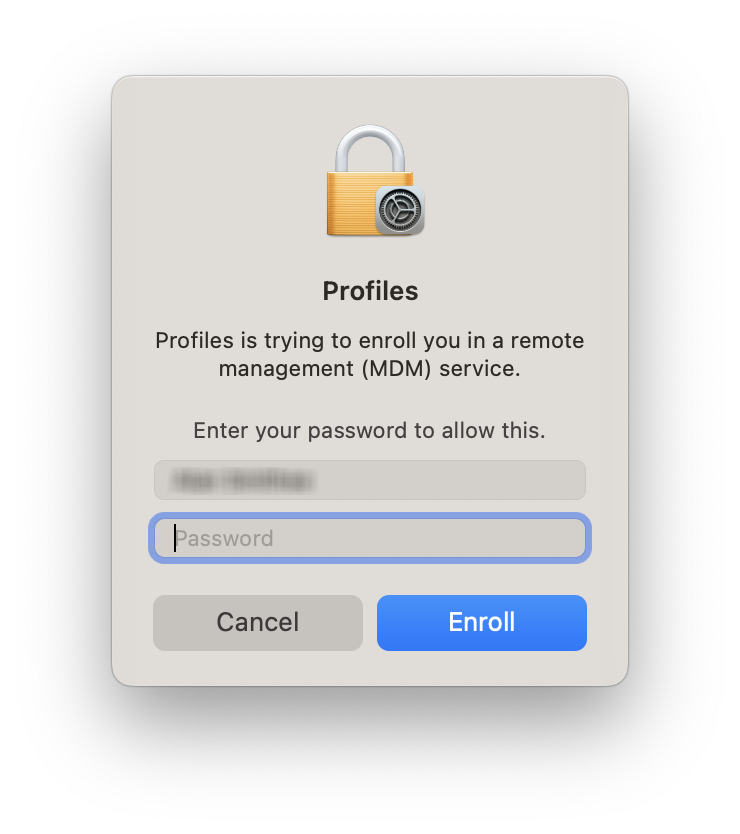
- Authenticate with the appropriate password when prompted with “Profiles is trying to enroll you in a remote management (MDM) service”.
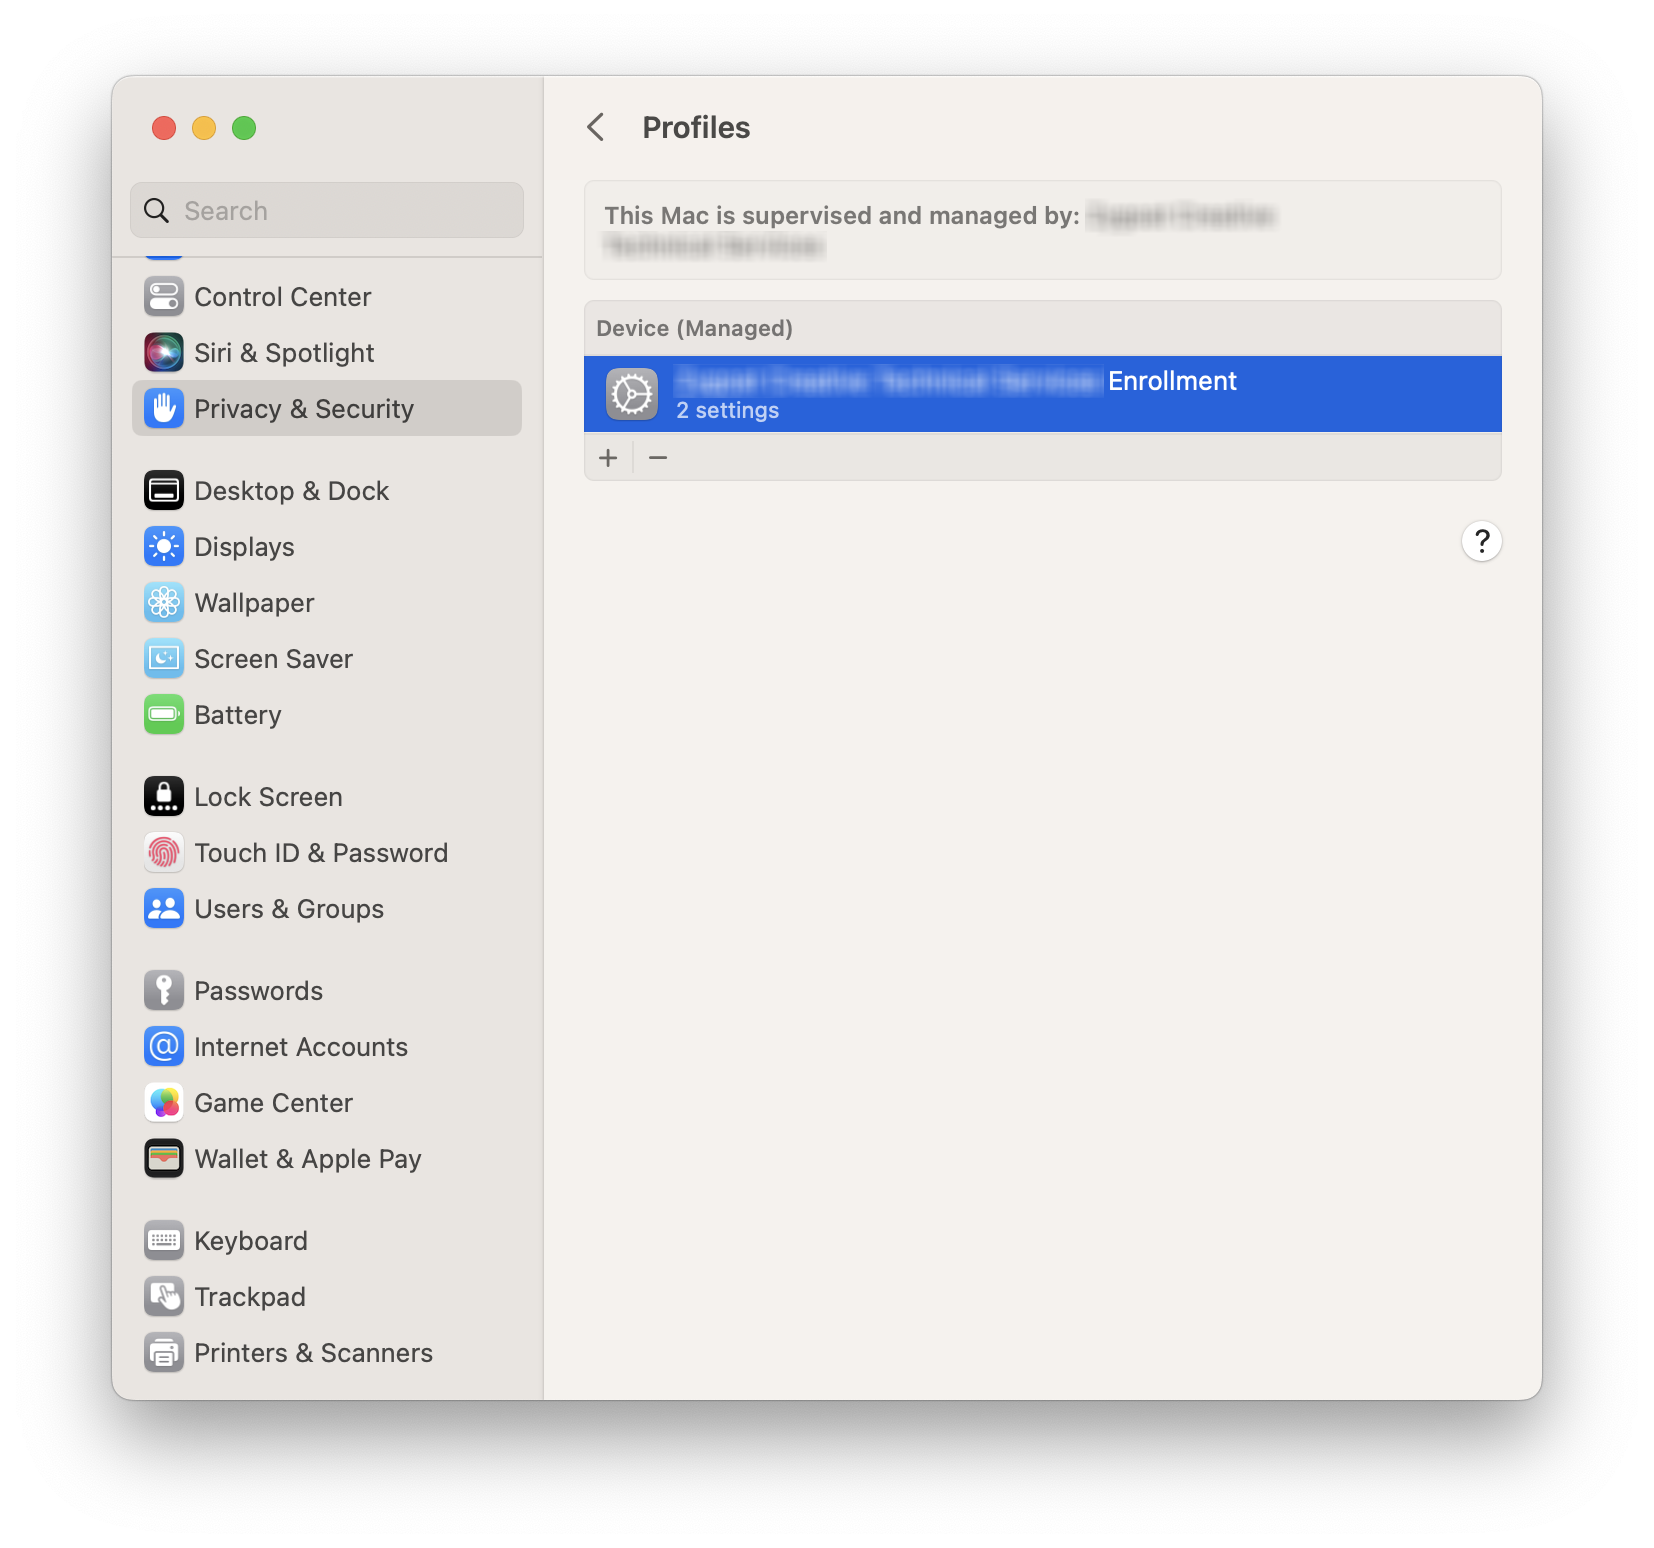
- Observe that System Settings declares “This Mac is supervised and managed by
”.
Provision a Mac with the LimaCharlie sensor
Choose the “Blueprints” tab in the Jamf Now sidebar.
Click the entry for the custom Blueprint you created from Step 6 onward in the “Prepare the LC sensor package on Jamf” section above.

- On the inner tab bar that appears, click “Devices”, and then “Add a Device”.

- Click on a device you want to provision, and then click “Add Devices” in the lower right corner.

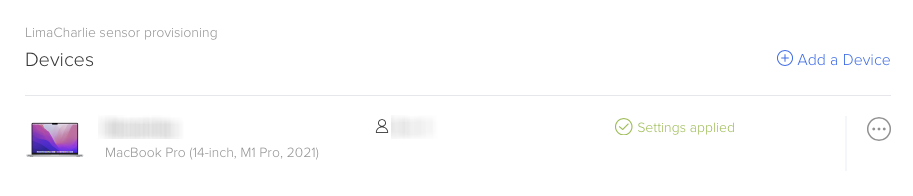
- Observe after a few moments that both the provisioning profile and the LimaCharlie sensor have been installed on the subject Mac.
- The Mac appear in the Jamf Devices list on the Blueprints tab with the label “Settings applied”. (It may initially appear as “Settings not applied”; simply refresh the page.)
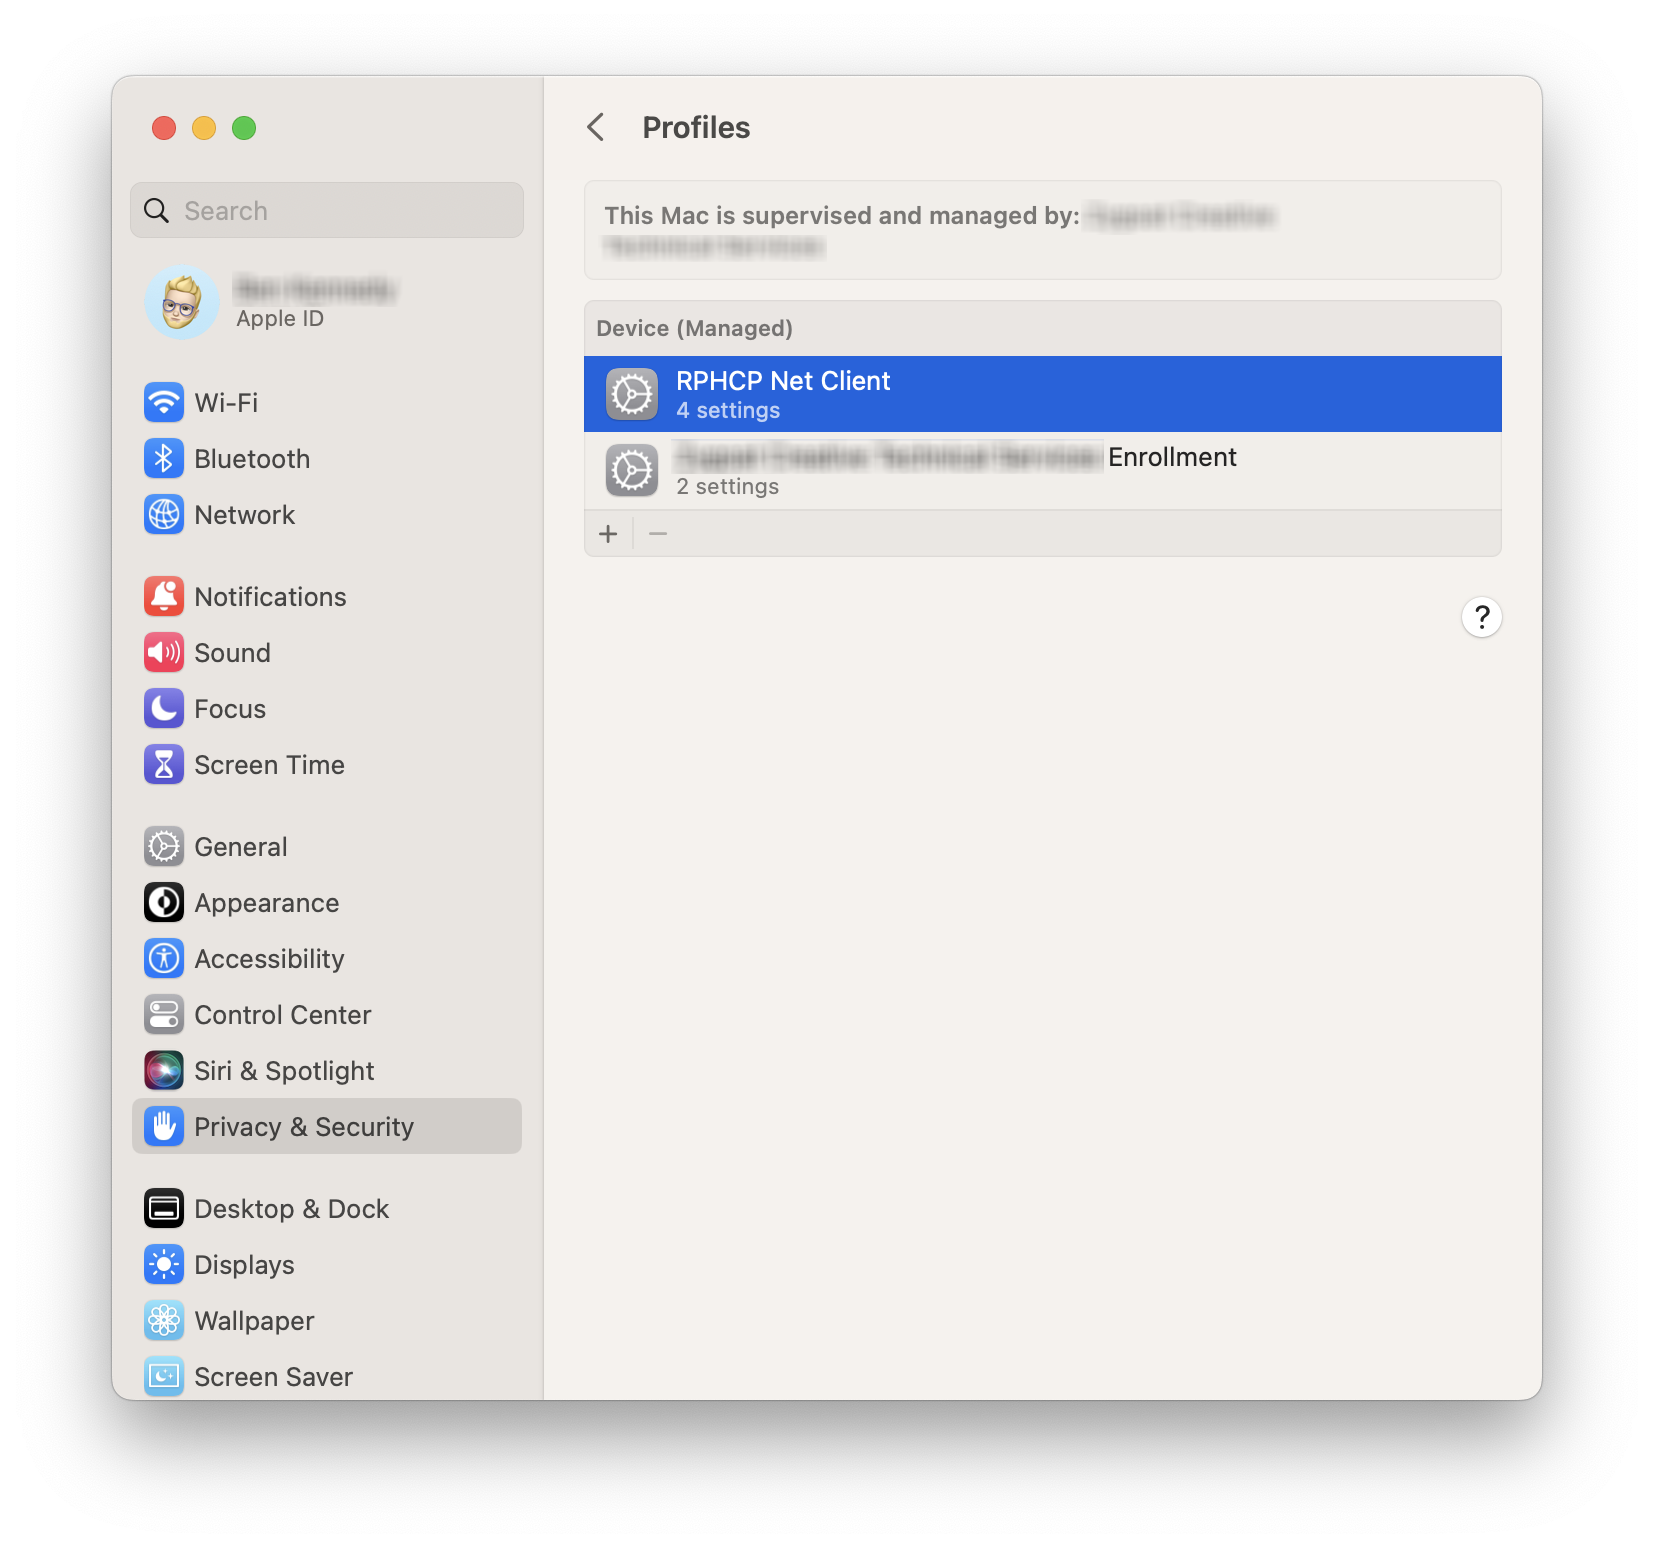
2. On the Mac itself, an additional profile appears in System Settings > Privacy & Security > Profiles.
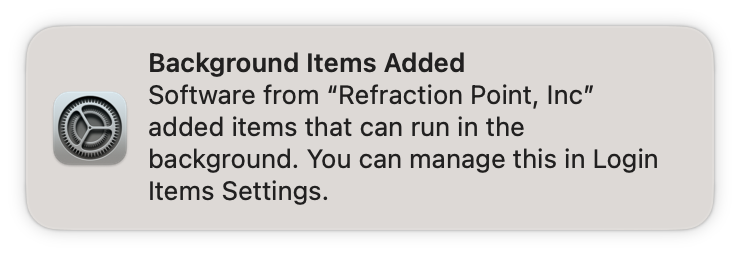
3. A “Background Items Added” notification is displayed.
4. The RPHCP.app appears in the Mac’s Applications folder, and the rphcp daemon is running.
Was this article helpful?