- 04 Nov 2023
- 2 Minutes to read
- Print
- DarkLight
Canarytokens
- Updated on 04 Nov 2023
- 2 Minutes to read
- Print
- DarkLight
Canarytokens are a free, quick, painless way to help defenders discover they've been breached (by having attackers announce themselves). Canarytokens are digital traps, or tripwires, that can be placed in an organization's network as a "lure" for adversaries. When actioned against, canaries will fire an alert, that can be forwarded to LimaCharlie.
Canarytokens can be ingested in LimaCharlie via a Webhook Adapter, and are recognized as the canary_token platform.
LimaCharlie published a blog post in April 2023 to discuss the Canarytoken integration. You can read more about that here.
Adapter Deployment
Canarytoken alerts are ingested via a cloud-to-cloud webhook Adapter configured to receive JSON events. The LimaCharlie platform has pre-built mapping for Canarytoken alerts. A Canarytokens Adapter can be initially deployed in two ways:
- Via the LimaCharlie web UI
- Via the LimaCharlie CLI
Regardless of which method utilized, Steps 2 and 3 will still be the same.
1a. Initial deployment via the LimaCharlie web UI
Within the LimaCharlie UI, navigate to Sensors > Sensors List > + Add Sensor. Select the Canary Token option.

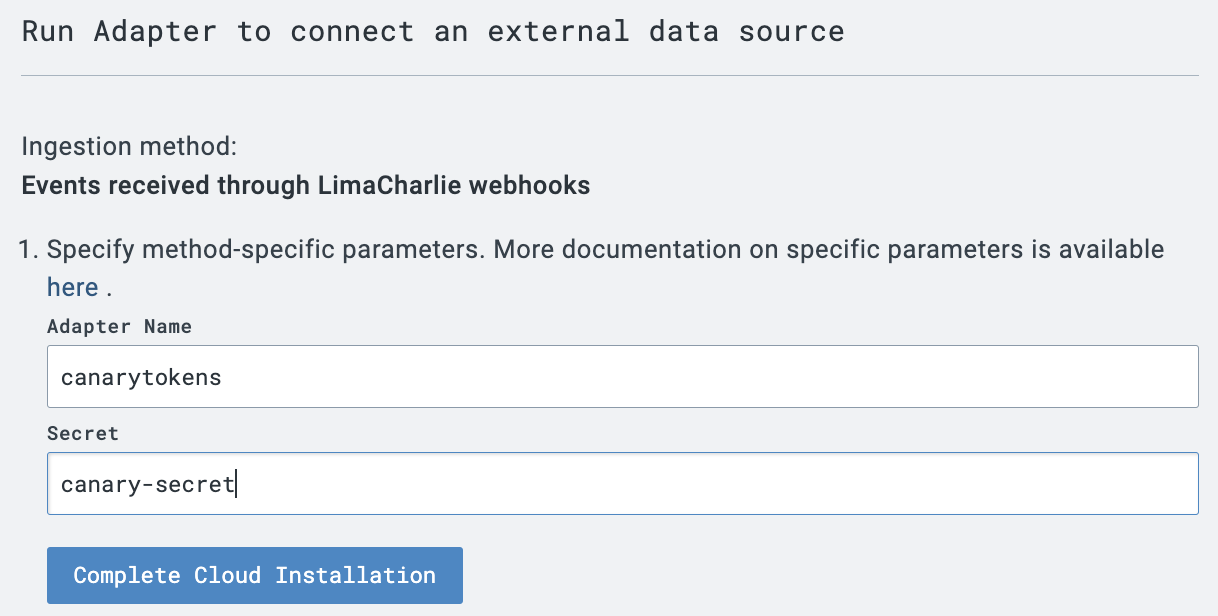
After selecting or creating an Installation Key, the web UI will ask you to name the Adapter and select a Secret value.

Clicking Complete Cloud Installation will create the cloud-to-cloud Adapter. Proceed to step 2 to continue.
1b. Initial deployment via the LimaCharlie CLI
A Canarytokens Adapter can be deployed via the LimaCharlie CLI. The following step is modified from the generic Webhook Adapter created documentation, found here.
The following configuration can be modified to easily configure a Webhook Adapter for receiving Canarytokens events.
{
    "sensor_type": "webhook",
    "webhook": {
       "secret": "canarytoken-secret",
        "client_options": {
            "hostname": "canarytokens",
            "identity": {
                "oid": "<your_oid>",
                "installation_key": "<your_installation_key>"
            },
            "platform": "canary_token",
            "sensor_seed_key": "canary-super-secret-key",
            "mapping" : {
                "event_type_path" : {{ 'Canarytoken Hit' }}
            }
        }
    }
}
Note that in the mapping above, the event_type_path field is set to a static string of Canarytoken Hit. You can change this to any desired value.
To create this webhook adapter, run the following command, replacing <json_config_file> with the name of the config file from above:
limacharlie hive set cloud_sensor --key canarytoken --data <json_config_file>
2. Building the Webhook URL
After creating the webhook, you'll need to retrieve the webhook URL from the Get Org URLs API call. You'll need the following information to complete the Webhook URL:
- Organization ID
- Webhook name (from the config)
- Secret (from the config)
Let's assume the returned domain looks like 9157798c50af372c.hook.limacharlie.io, the format of the URL would be:
https://9157798c50af372c.hook.limacharlie.io/OID/HOOKNAME/SECRET
Note that the secret value can be provided in the webhook URL or as an HTTP header named lc-secret.
3. Configuring the Canaryalert Webhook Output
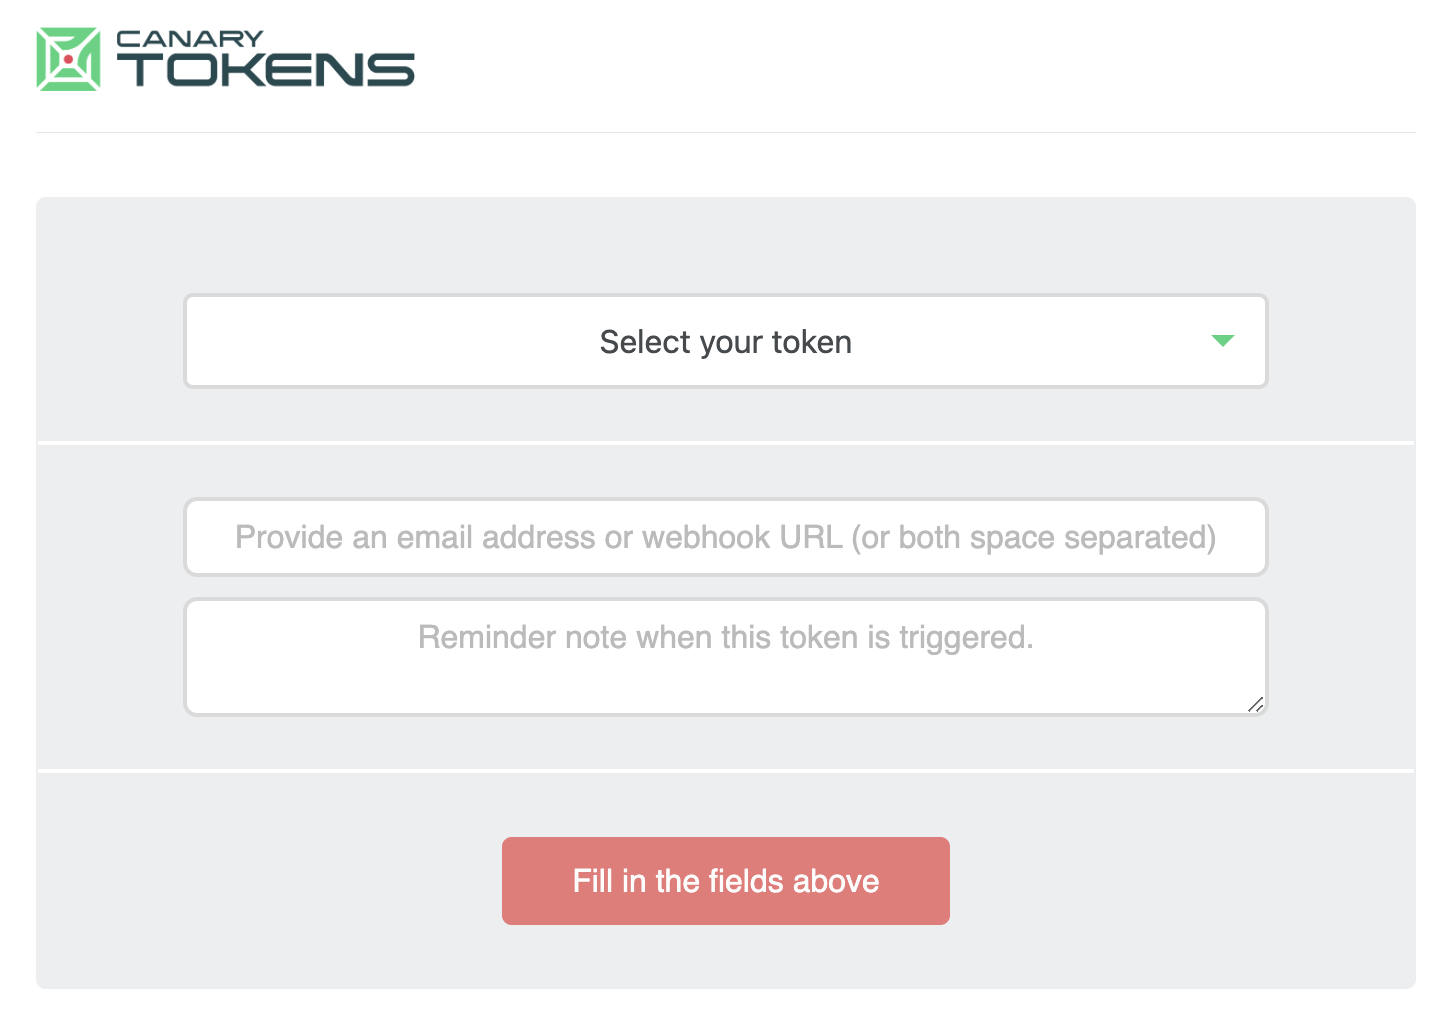
Navigate to the Canarytokens generate page to create your token of choice.

Utilize the URL from Step 2 as the webhook URL. Provide a reminder note, which will also appear in the Canarytoken alert when tripped. Click Create my Canarytoken, which will provide you the content related to the selected token. When the Canarytoken is tripped, a webhook alert will be forwarded to the LimaCharlie Adapter.

